It is not too early to start thinking about handmade gifts for the holidays! Try this tutorial for beaded hoop earrings. This DIY craft looks great and is a lot of fun once you get the hang of it.

Beaded Hoop Earrings
These would make a beautiful gift for the holidays, or you could even sell them at a craft show! Perhaps you or your children woud like to make them for all of their friends for party favors or friendship earrings.
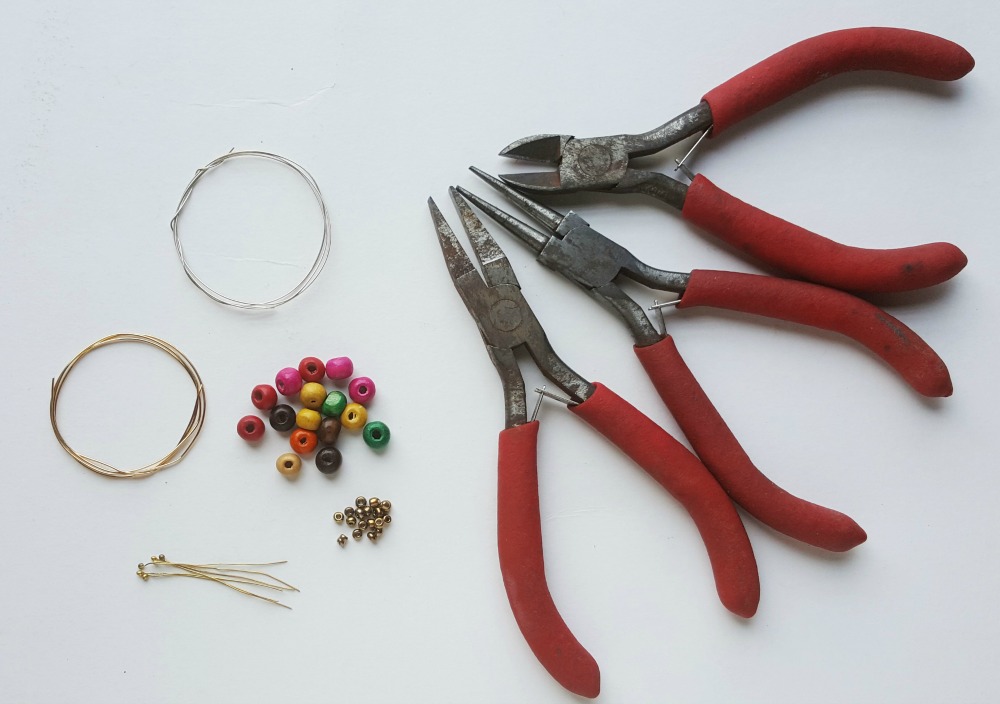
You Will Need:
Please note, all links below are affiliate links.
- Jewelry wire – 24 gauge, 28 gauge
- Jewelry pliers – cutting, looping and flat nose pliers
- Colored wooden beads – small size (0.5 cm)
- Jewelry headpin wire
- Seed beads
To Make Beaded Hoop Earrings:
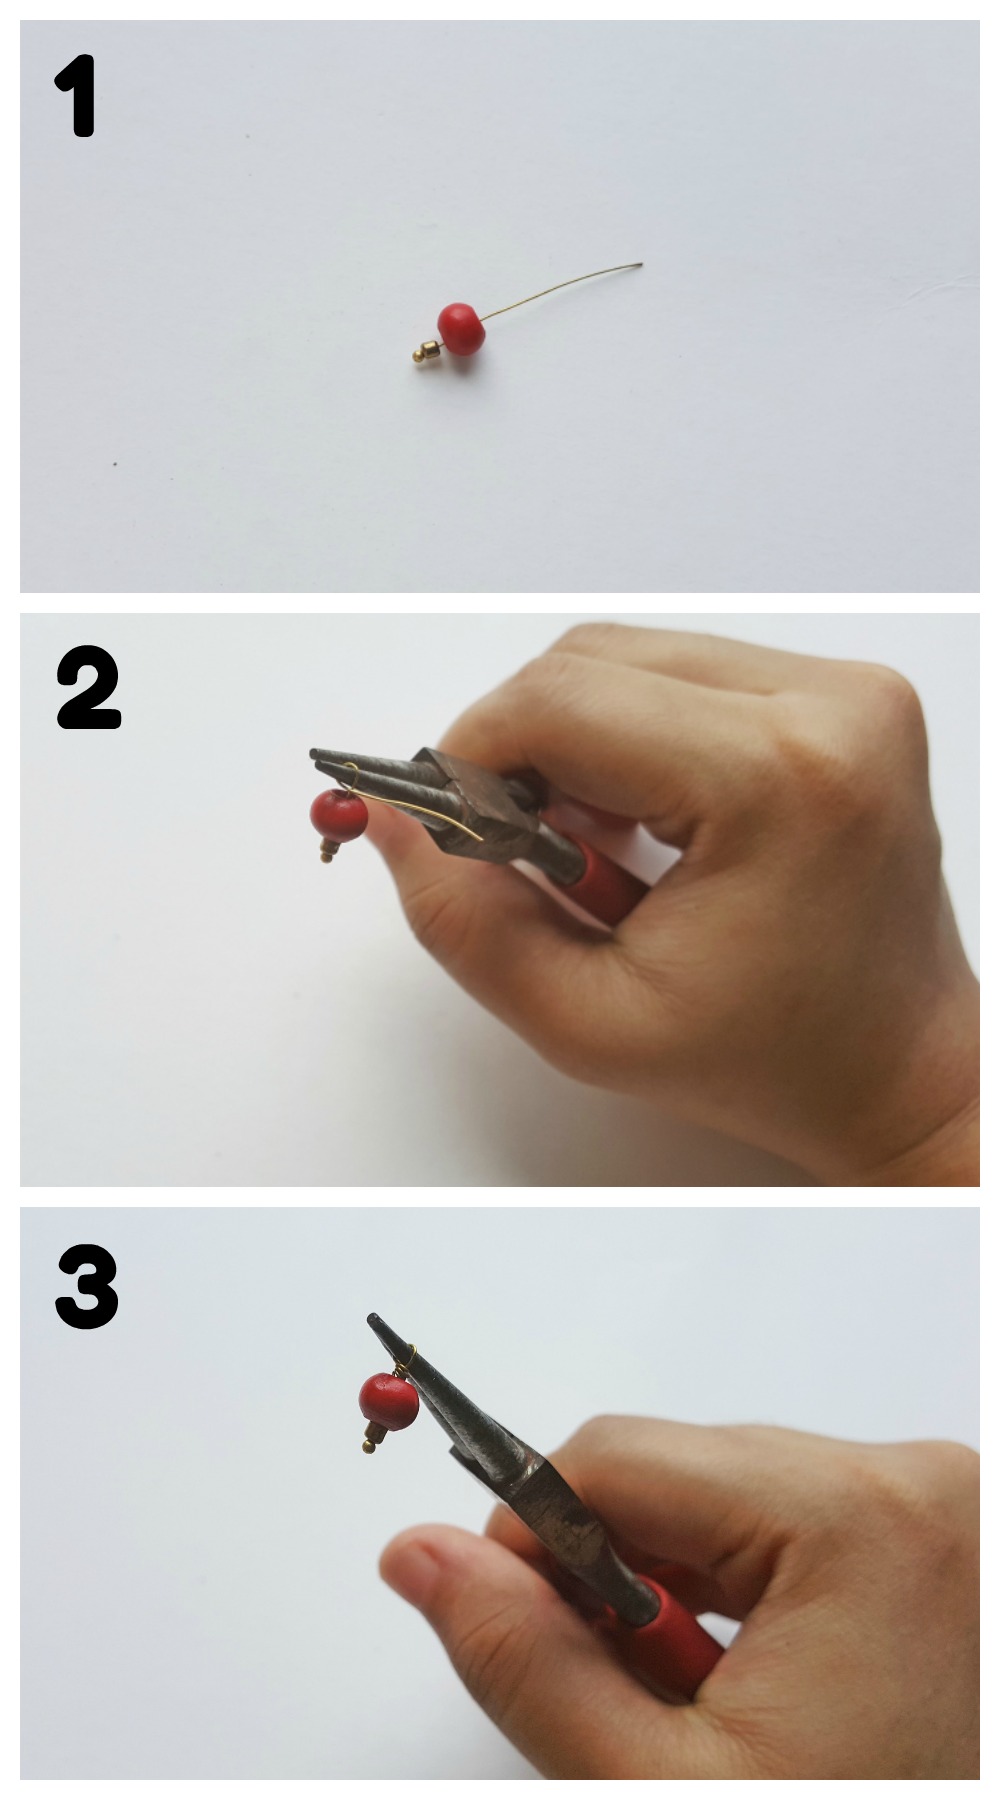
- Take a headpin wire and insert a seed bead and then a small wooden bead through its open end.
- Create a small loop adjacent to the wooden bead at the pen end of the wire.
- Coil the remaining wire of the head pins’ open end below the loop.
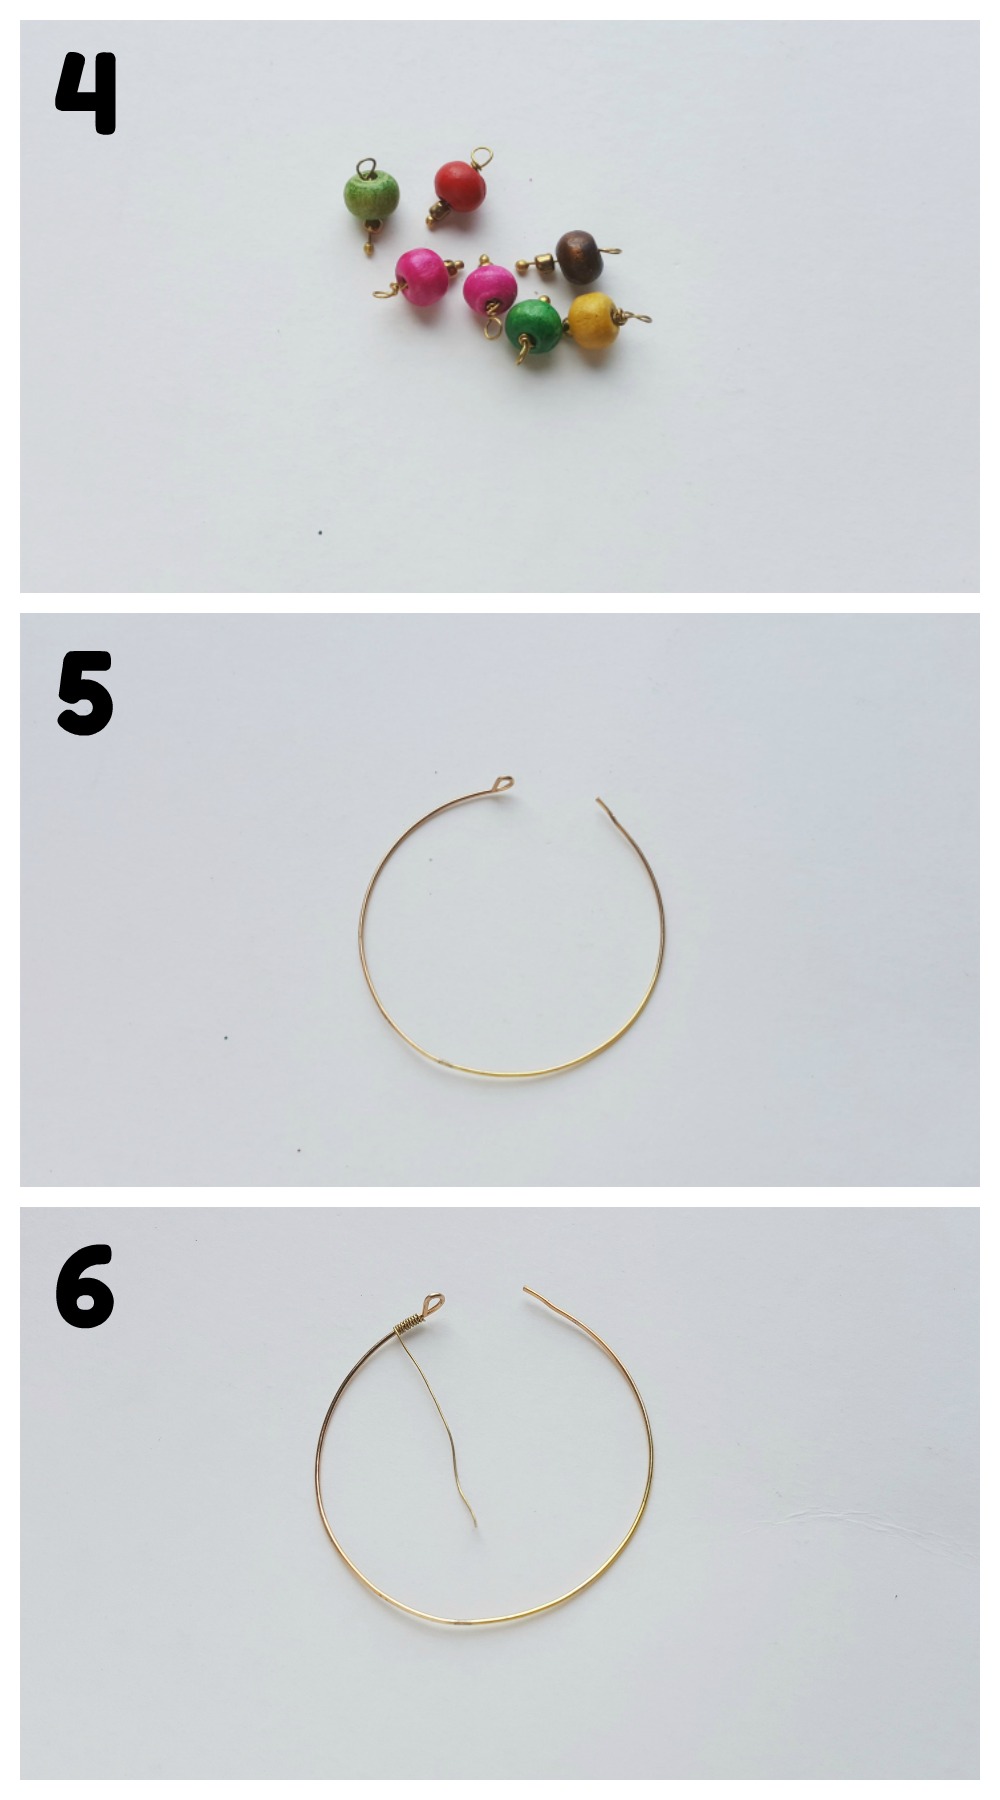
- Similarly prepare a few more beaded headpins.
- Measure the size (circumference) for the hoop earrings and cut out 2 pieces of the same size wires from the 24 gauge wire according to the measurement. Take any one of the cut out wires and use the looping piers to create a small loop at any one end of the wire; keep the other end open. Create a hoop pattern with the cut out wire.
- Take a 28 gauge wire and coil it around the hoop pattern adjacent to the loop. Keep the coil neat and tight.
- Once the coiling reaches 1cm length you can stop coiling and cut off extra wire from the bundle. Insert a seed bead into the hoop through its open end and push it adjacent to the coiled pattern.
- Insert a wooden bead and then a beaded headpin into the hoop through its open end.
- Continue to insert 1 wooden bead and 1 beaded headpin into the hoop one by one.

- Stop beading once you’re satisfied with the length of the beading.
- Now, insert a seed bead and then coil 28 gauge wire around the hoop band, right after the beading ends. Also bend 0.5cm of the hoop’s open end to 90 degrees. This bent part will go through the loop at the other end to close the earrings after wearing it.
- Similarly create the other earring to complete the pair!

As you can see, it would be easy to customize these earrings with different colors of wire and beads. Create an earring of the day for each day of the week, or present them as a thoughtful and homemade teacher’s gift!

Hi ABOUT JENN L I Love Your Article Thanks For Sharing This Beautiful Post
It’s great knowledge for DIY Craft