Story Stones are becoming more and more popular, especially among my “crunchy” mom group peers. The idea of them is to use a set of stones to help illustrate a story, which you can read aloud or tell from memory to your family.
They make me think of how families might have told stories before books were so readily available and before you could find pretty much any story read for you on Youtube. Children will use their imagination to formulate what the story looked like as it was happening, and story stones are a good tool to help get their creative juices flowing. These are terrific for pre-readers to use to tell you THEIR version of a story with the pictures as a visual aid.

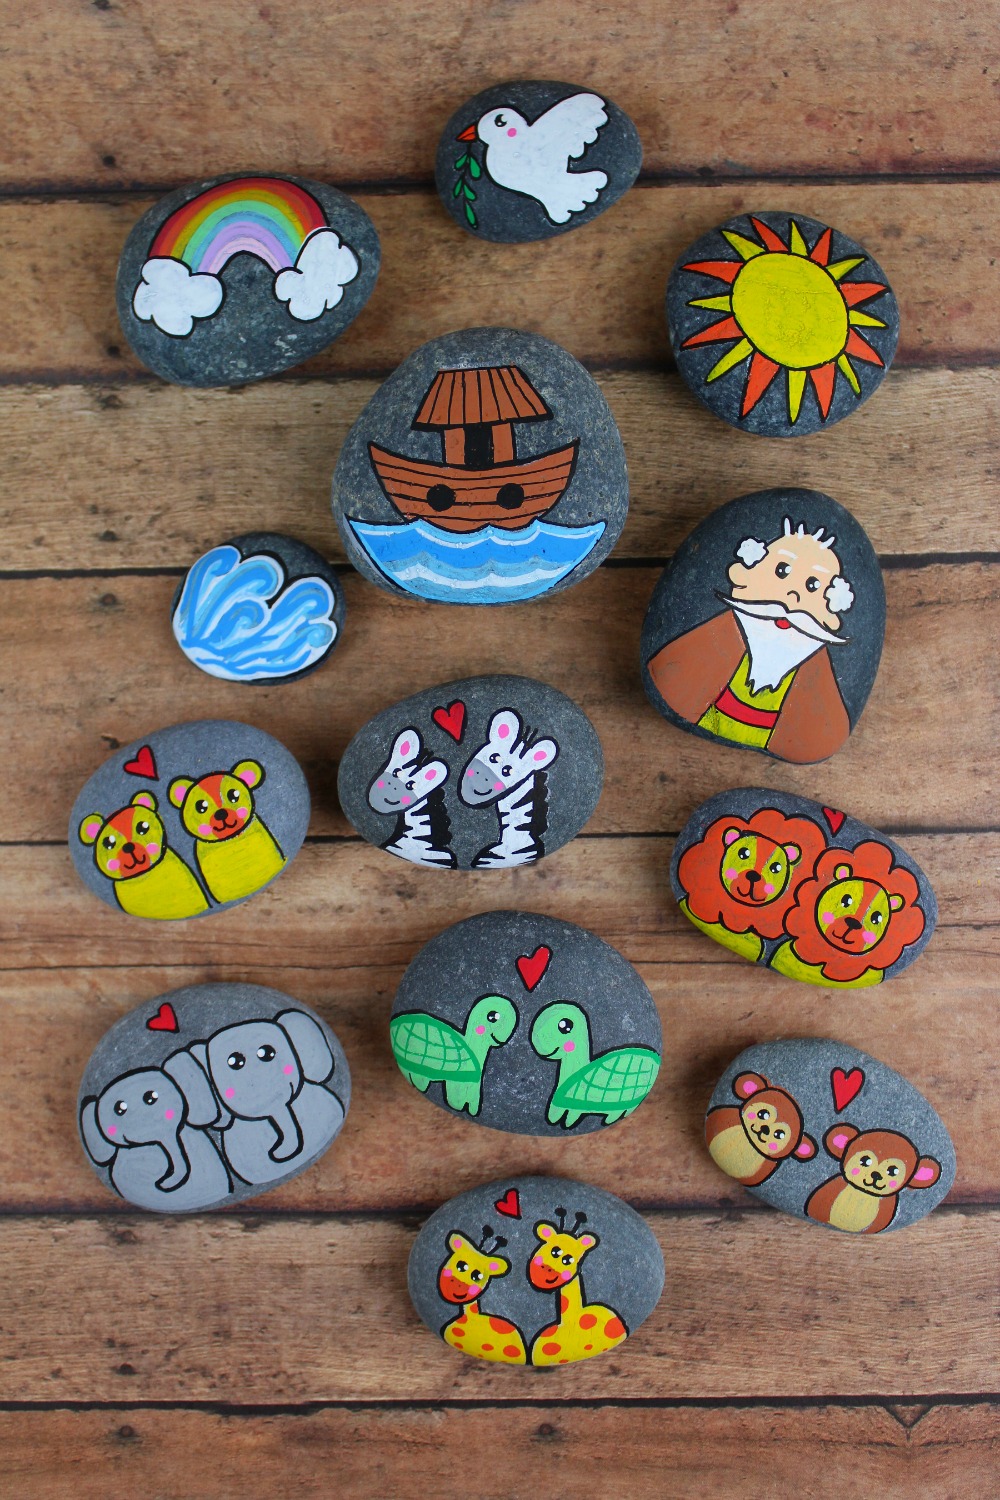
Below is a brief set of instructions for making your very own story stones. I’m also including pictures of a completed set that would go along with the popular Bible story of Noah’s Ark. Notice how much fun they look with bright colors and cheerful illustrations painted right onto them!
Storing the stones in a pouch will help them to stay together and last longer, so the stories can be shared for years to come. This would be a great family tradition, and a welcome site when the pouch gets pulled out. Sunday School classes might also like these story stones! It is a cost-effective and space-saving alternative to felt boards of the past. What do you think?
Story Stones
You Will Need:

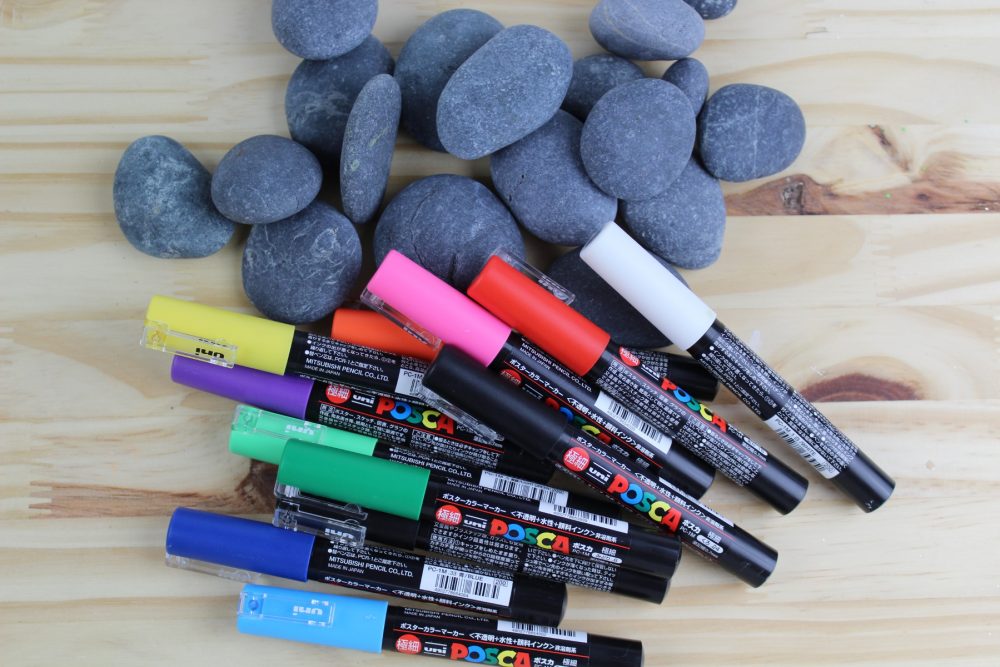
Stones/Rocks (affiliate link)
Paint Pens, including a black one (Posca *affiliate link* makes a great one – fine is good for details)
Pencil
Canvas Bag
Alphabet Stencil
Spray Sealer or Mod Podge (optional, but recommended)
To Make:
-
After gathering all of the supplies, you will first rinse the stones in warm water until all of the powder residue on the outside has been removed. Set the stones on a towel and allow them to dry completely.
-
Use a pencil to sketch the design you would like to paint onto the stone.
-
Use your paint pens to color the stones.
-
Use a black paint pen to outline the painted stone.
-
Allow the paint to dry completely.
-
You are now ready to use your stones to narrate a story. You can even flip them over and write words on the back of the stones.
-
If you’d like, create a small canvas bag to store your story stones. Use an alphabet stencil to paint words onto the canvas bag. Allow to dry completely before storing your stones.
-
If you’d like to protect your stones for many uses, use a spray sealer or Mod Podge. (affiliate link)


These are so cute… did you paint these? I haven’t heard of story stones but sounds like a great idea for little ones! Last summer hiding painted stones around town was really popular out here.